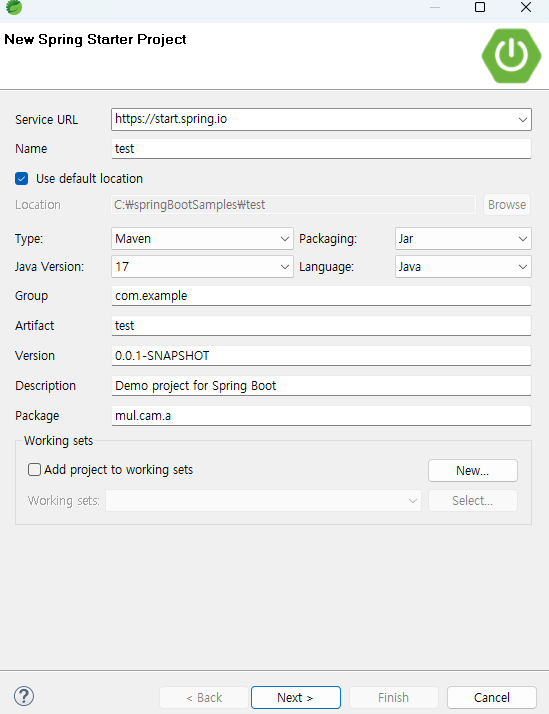
Theme. Spring Boot를 DB와 연결하기 위한 설정
< pom.xml >
|
1
2
3
4
5
6
7
8
9
10
11
12
13
14
15
16
17
18
19
20
21
22
23
24
25
26
27
28
29
30
31
32
33
34
35
36
37
38
39
40
41
42
43
44
45
46
47
48
49
50
51
52
53
54
55
56
57
58
59
60
61
62
63
64
65
66
67
68
69
70
71
72
73
74
75
76
77
78
79
80
81
82
83
84
85
86
87
88
89
90
91
92
93
94
|
<?xml version="1.0" encoding="UTF-8"?>
<project xmlns="http://maven.apache.org/POM/4.0.0" xmlns:xsi="http://www.w3.org/2001/XMLSchema-instance"
xsi:schemaLocation="http://maven.apache.org/POM/4.0.0 https://maven.apache.org/xsd/maven-4.0.0.xsd">
<modelVersion>4.0.0</modelVersion>
<parent>
<groupId>org.springframework.boot</groupId>
<artifactId>spring-boot-starter-parent</artifactId>
<version>3.0.5</version>
<relativePath/> <!-- lookup parent from repository -->
</parent>
<groupId>com.example</groupId>
<artifactId>sample3-db</artifactId>
<version>0.0.1-SNAPSHOT</version>
<name>sample3-db</name>
<description>Demo project for Spring Boot</description>
<properties>
<java.version>17</java.version>
</properties>
<dependencies>
<dependency>
<groupId>org.springframework.boot</groupId>
<artifactId>spring-boot-starter</artifactId>
</dependency>
<dependency>
<groupId>org.springframework.boot</groupId>
<artifactId>spring-boot-starter-test</artifactId>
<scope>test</scope>
</dependency>
<dependency>
<groupId>org.springframework.boot</groupId>
<artifactId>spring-boot-starter-web</artifactId>
</dependency>
<dependency>
<groupId>org.springframework.boot</groupId>
<artifactId>spring-boot-starter-tomcat</artifactId>
</dependency>
<dependency>
<groupId>com.fasterxml.jackson.core</groupId>
<artifactId>jackson-core</artifactId>
<version>2.14.1</version>
</dependency>
<dependency>
<groupId>com.fasterxml.jackson.core</groupId>
<artifactId>jackson-databind</artifactId>
<version>2.14.1</version>
</dependency>
<dependency>
<groupId>org.springframework.boot</groupId>
<artifactId>spring-boot-starter-jdbc</artifactId> <!-- Spring Boot 버전과 동일하게 맞춰줄 것 -->
</dependency>
<dependency>
<groupId>org.mybatis.spring.boot</groupId>
<artifactId>mybatis-spring-boot-starter</artifactId>
<version>3.0.1</version>
</dependency>
<dependency>
<groupId>org.mybatis</groupId>
<artifactId>mybatis-spring</artifactId>
<version>3.0.1</version>
</dependency>
<dependency>
<groupId>org.mybatis</groupId>
<artifactId>mybatis</artifactId>
<version>3.5.11</version>
</dependency>
<dependency>
<groupId>mysql</groupId>
<artifactId>mysql-connector-java</artifactId>
<version>8.0.29</version>
</dependency>
</dependencies>
<build>
<plugins>
<plugin>
<groupId>org.springframework.boot</groupId>
<artifactId>spring-boot-maven-plugin</artifactId>
</plugin>
</plugins>
</build>
</project>
|
cs |
< application.properties >
|
1
2
3
4
5
6
7
8
|
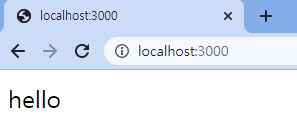
server.port=3000
spring.datasource.hikari.driver-class-name=com.mysql.cj.jdbc.Driver
spring.datasource.hikari.jdbc-url=jdbc:mysql://localhost:포트넘버/DB명?serverTimeZone=Asia/Seoul
spring.datasource.hikari.username=아이디
spring.datasource.hikari.password=비밀번호
|
cs |
< DB Config >
|
1
2
3
4
5
6
7
8
9
10
11
12
13
14
15
16
17
18
19
20
21
22
23
24
25
26
27
28
29
30
31
32
33
34
35
36
37
38
39
40
41
42
43
44
45
46
47
48
49
50
51
52
53
54
55
56
57
|
package mul.cam.a;
import javax.sql.DataSource;
import org.apache.ibatis.session.SqlSessionFactory;
import org.mybatis.spring.SqlSessionFactoryBean;
import org.mybatis.spring.SqlSessionTemplate;
import org.springframework.boot.context.properties.ConfigurationProperties;
import org.springframework.context.annotation.Bean;
import org.springframework.context.annotation.Configuration;
import org.springframework.context.annotation.PropertySource;
import org.springframework.core.io.Resource;
import org.springframework.core.io.support.PathMatchingResourcePatternResolver;
import com.zaxxer.hikari.HikariConfig;
import com.zaxxer.hikari.HikariDataSource;
@Configuration
@PropertySource("classpath:/application.properties")
public class DatabaseConfig {
@Bean
@ConfigurationProperties(prefix = "spring.datasource.hikari")
public HikariConfig hikariConfig() {
return new HikariConfig();
}
@Bean
public DataSource dataSource() {
DataSource dataSource = new HikariDataSource(hikariConfig());
System.out.println("dataSource: " + dataSource);
return dataSource;
}
@Bean
public SqlSessionFactory sqlSessionFactory(DataSource dataSource) throws Exception {
System.out.println("DatabaseConfig sqlSessionFactory");
SqlSessionFactoryBean sqlSessionFactoryBean = new SqlSessionFactoryBean();
sqlSessionFactoryBean.setDataSource(dataSource);
Resource[] arrResource = new PathMatchingResourcePatternResolver().getResources("classpath:sqls/*.xml");
sqlSessionFactoryBean.setMapperLocations(arrResource);
sqlSessionFactoryBean.getObject().getConfiguration().setMapUnderscoreToCamelCase(true);
return (SqlSessionFactory)sqlSessionFactoryBean.getObject();
}
@Bean
public SqlSessionTemplate sqlSession(SqlSessionFactory sqlSessionFactory) {
return new SqlSessionTemplate(sqlSessionFactory);
}
}
|
cs |
간단한 예시로 Member.xml - MemberDao - MemberService - MemberController 순으로 연결을 간단하게 살펴보자.
사용되는 MemberDto는 아래와 같다.
|
1
2
3
4
5
6
7
8
9
10
11
12
13
14
15
16
17
18
19
20
21
22
23
24
25
26
27
28
29
30
31
32
33
34
35
36
37
38
39
40
41
42
43
44
45
46
47
48
49
50
51
52
53
54
55
56
57
58
59
60
61
62
63
64
65
66
67
68
69
70
|
package mul.cam.a.dto;
public class MemberDto {
private String id;
private String pwd;
private String name;
private String email;
private int auth;
public MemberDto() {
}
public MemberDto(String id, String pwd, String name, String email, int auth) {
super();
this.id = id;
this.pwd = pwd;
this.name = name;
this.email = email;
this.auth = auth;
}
public String getId() {
return id;
}
public void setId(String id) {
this.id = id;
}
public String getPwd() {
return pwd;
}
public void setPwd(String pwd) {
this.pwd = pwd;
}
public String getName() {
return name;
}
public void setName(String name) {
this.name = name;
}
public String getEmail() {
return email;
}
public void setEmail(String email) {
this.email = email;
}
public int getAuth() {
return auth;
}
public void setAuth(int auth) {
this.auth = auth;
}
@Override
public String toString() {
return "MemberDto [id=" + id + ", pwd=" + pwd + ", name=" + name + ", email=" + email + ", auth=" + auth + "]";
}
}
|
cs |
< Member.xml >
주의할 것은 mapper의 namespace에 패키지명도 함께 적어야한다는 것이고, sql문 부분의 id값이 dao에서의 함수명으로 동일하게 사용된다는 것이다.
|
1
2
3
4
5
6
7
8
9
10
11
12
13
14
15
16
|
<?xml version="1.0" encoding="UTF-8"?>
<!DOCTYPE mapper PUBLIC "-//mybatis.org//DTD Mapper 3.0//EN"
"http://mybatis.org/dtd/mybatis-3-mapper.dtd">
<mapper namespace="mul.cam.a.dao.MemberDao"> <!-- mapper에 패키지명도 적어야! -->
<select id="allMember" resultType="mul.cam.a.dto.MemberDto">
select id, pwd, name, email, auth
from member
</select>
</mapper>
|
cs |
< MemberDao.java >
MemberDao.java는 인터페이스이다.
|
1
2
3
4
5
6
7
8
9
10
11
12
13
14
15
16
17
18
|
package mul.cam.a.dao;
import java.util.List;
import org.apache.ibatis.annotations.Mapper;
import org.springframework.stereotype.Repository;
import mul.cam.a.dto.MemberDto;
@Mapper // Member.xml의 id값이 그대로 함수명이 된다.
@Repository
public interface MemberDao {
// 함수명은 반드시 Member.xml의 해당 id값과 동일해야 한다
List<MemberDto> allMember();
}
|
cs |
< MemberService.java >
|
1
2
3
4
5
6
7
8
9
10
11
12
13
14
15
16
17
18
19
20
21
22
23
|
package mul.cam.a.service;
import java.util.List;
import org.springframework.beans.factory.annotation.Autowired;
import org.springframework.stereotype.Service;
import org.springframework.transaction.annotation.Transactional;
import mul.cam.a.dao.MemberDao;
import mul.cam.a.dto.MemberDto;
@Service
@Transactional
public class MemberService {
@Autowired
MemberDao dao;
public List<MemberDto> allMember(){ // dao와 함수명이 꼭 같을 필요는 없다.
return dao.allMember();
}
}
|
cs |
< MemberController.java >
|
1
2
3
4
5
6
7
8
9
10
11
12
13
14
15
16
17
18
19
20
21
22
23
24
25
26
|
package mul.cam.a.controller;
import java.util.Date;
import java.util.List;
import org.springframework.beans.factory.annotation.Autowired;
import org.springframework.web.bind.annotation.GetMapping;
import org.springframework.web.bind.annotation.RestController;
import mul.cam.a.dto.MemberDto;
import mul.cam.a.service.MemberService;
@RestController
public class MemberController {
@Autowired
MemberService service;
@GetMapping(value = "/allList")
public List<MemberDto> allList(){
System.out.println("MemberController allList " + new Date());
return service.allMember();
}
}
|
cs |
끝.
'Spring' 카테고리의 다른 글
| [Spring Boot] File 업로드 및 다운로드 (0) | 2023.03.26 |
|---|---|
| [Spring Boot] 스프링 부트 실행 및 기초 (0) | 2023.03.26 |