[React] 리액트 시작 및 기초
Theme. 리액트의 시작
- node.js를 설치했고, vs code를 사용한다.
< "터미널"에서 사용되는 명령어! >
1. 프로젝트 생성
npx create-react-app 프로젝트명
2. 프로젝트 실행
cd 프로젝트 명
npm start
3. 서버 끄기(작업끝내기)
ctrl + c
4. 상위 폴더로 이동
cd ..
Theme. 컴포넌트(Component) 만들기
Component는 사용자 정의 태그이다. 리액트에서의 속성은 prop이라고 한다.
간단하게 Component를 만들고, 동시에 props를 사용해보자.
|
1
2
3
4
5
6
7
8
9
10
11
12
13
14
15
16
17
18
19
20
21
22
23
24
25
26
27
28
|
function App() {
function Message(){ // component 만드려는 함수의 첫글자는 대문자!
return <h1>Hello React</h1>
}
function MessageOne(props){ // props는 가인수
return ( // 여러 태그를 return 해줄 때는 div태그로 묶어서 작성해야 한다
<div>
<h2>Hello {props.name}</h2>
<p>Hi {props.name}</p>
</div>
)
}
return (
<div>
{Message()} {/* 함수 호출 */}
<Message></Message> {/* component */}
<Message /> {/* component */}
<MessageOne name="춘향" /> {/* component */}
</div>
);
}
export default App;
|
cs |
실행 결과는 아래와 같다.
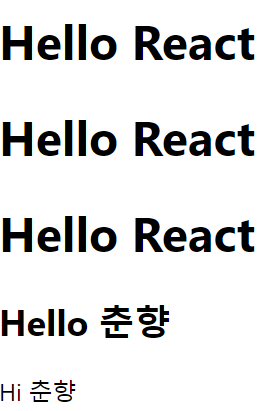
먼저, <Message>, <MessageOne>이라는 태그를 만들기 위해서, 즉 컴포넌트를 만들기 위해서 function 방식을 이용했다. 이때 함수명의 첫글자는 반드시 대문자여야 한다.
<MessageOne name="춘향"> 에서 MessageOne이라는 function이 props을 통해 name="춘향"이라는 object를 받게 된다. 그래서 {props.name}와 같이 사용이 가능하다. key값이 name, 그 value는 "춘향"인 셈.
추가적으로, message.js라는 파일을 만들고, 그 안에 MessageTwo라는 function을 만들어 컴포넌트를 만드려고 한다.
외부에서 만들어준 것이기 때문에
import MessageTwo from './message'; 를 작성해줘야 한다. (동일 프로젝트 내에 존재하므로 ./ 이다)
먼저, message.js은 다음과 같다.
|
1
2
3
4
5
6
7
8
|
function MessageTwo(props){
console.log('MessageTwo 호출');
return <div>nice to meet you {props.name} </div>
}
export default MessageTwo;
|
cs |
코드가 추가된 App.js은 다음과 같다.
|
1
2
3
4
5
6
7
8
9
10
11
12
13
14
15
16
17
18
19
20
21
22
23
24
25
26
27
28
29
30
31
32
33
34
35
36
37
|
import MessageTwo from './message';
function App() {
function Message(){ // component 만드려는 함수의 첫글자는 대문자!
return <h1>Hello React</h1>
}
// function MessageOne(props){ // props는 가인수
// return <h2>Hello {props.name}</h2>
// }
function MessageOne(props){ // props는 가인수
return ( // 여러 태그를 return 해줄 때는 div태그로 묶어서 작성해야 한다
<div>
<h2>Hello {props.name}</h2>
<p>Hi {props.name}</p>
</div>
)
}
return (
<div>
{Message()}
<Message></Message> {/* component */}
<Message /> {/* component */}
<MessageOne name="춘향" /> {/* component */}
<MessageTwo name="홍두깨" /> {/* component */}
</div>
);
}
export default App;
|
cs |
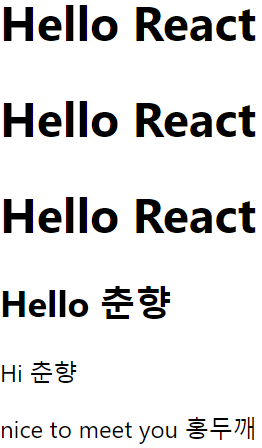
그 결과는,
Theme. map의 사용
|
1
2
3
4
5
6
7
8
9
10
11
12
13
14
15
16
17
18
19
20
21
22
23
24
25
26
27
|
function App(){
// return (
// <div>
// <ul>
// <li>Apple</li>
// <li>Banana</li>
// <li>Pear</li>
// </ul>
// </div>
// )
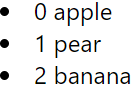
// 위와 같은 효과를 나타내기 위해서 map을 사용한다면?
const arr = ["apple", "pear", "banana"];
// map 사용시 key값을 넣어줘야 하는 규칙에 주의
const datalist = arr.map((a, index) => (<li key={index}>{index} {a}</li>))
return(
<div>
{datalist}
</div>
)
}
export default App;
|
cs |
|
1
2
3
4
5
6
7
8
9
10
11
12
13
14
15
16
17
18
19
20
21
22
23
24
25
26
27
28
29
30
31
|
function App(){
const members = [
{ "number":1, "name":"홍길동", "height":172.1 },
{ "number":2, "name":"성춘향", "height":158.1 },
{ "number":3, "name":"일지매", "height":181.1 }
];
// map 사용시 key값을 넣어줘야 하는 규칙에 주의
const memberlist = members.map(function(member, index){
return (
<tr key={index}>
<th>{member.number}</th>
<td>{member.name}</td>
<td>{member.height}</td>
</tr>
)
});
return (
<div>
<table border="1">
<tbody>
{memberlist}
</tbody>
</table>
</div>
)
}
export default App;
|
cs |
위와 같은 결과를 나타내는 코드를 다시 작성해보자.
|
1
2
3
4
5
6
7
8
9
10
11
12
13
14
15
16
17
18
19
20
21
22
23
24
25
26
27
28
29
30
31
32
|
function App(){
const members = [
{ "number":1, "name":"홍길동", "height":172.1 },
{ "number":2, "name":"성춘향", "height":158.1 },
{ "number":3, "name":"일지매", "height":181.1 }
];
const memfunc = (member, index) => {
return (
<tr key={index}>
<th>{member.number}</th>
<td>{member.name}</td>
<td>{member.height}</td>
</tr>
)
}
const memberlist = members.map(memfunc);
return (
<div>
<table border="1">
<tbody>
{memberlist}
</tbody>
</table>
</div>
)
}
export default App;
|
cs |
그 결과는,

Theme. 이벤트
|
1
2
3
4
5
6
7
8
9
10
11
12
13
14
15
16
17
18
19
20
21
22
23
24
25
|
function App(){
function btnclick(){
alert('btnclick');
}
function inputFunc(e){
console.log(e.target.value)
}
return (
<div>
<button onClick={ () => btnclick() }>버튼</button>
<button onClick={ () => {console.log('버튼클릭')} }>버튼</button>
<input type="text" onChange={ (event) => {console.log(event.target.value)}} />
<input type="text" onChange={ inputFunc } />
<input type="checkbox" />
</div>
)
}
export default App;
|
cs |
먼저, (event) => ..... 에서의 event와 inputFunc(e)에서의 e 모두 이벤트 객체이다.
이벤트 객체는 이벤트 상황을 제어할 수 있는 여러가지 정보와 기능이 있다.
이중, 위에서 event.target.value 부분의 의미를 살펴보면,
event.target은 이벤트를 발생시킨 target! 이벤트를 발생시킨 부분! 을 말하는 것이고,
event.target.value는 이벤트를 발생시킨 target의 value를 가져온다는 의미이다.
이때, input 태그를 사용했기 때문에 value를 적은 것이다.
onChange 이벤트이므로 input 부분에 텍스트를 적거나 고칠 때마다 console에 나타내게 된다.